Configure workflows to integrate them into your targeting strategy like any other agent.
1. What are the core features available?
The "Automation" section in the iAdvize admin allows you to easily configure workflows with :
- Unlimited number of multiple choices*
- Configure transfert for each choice
- Easy to re-order multiple choices
- Detect the visitor intent by asking an open question
-
Configure each intent action (transfert, continue workflow…)
- Add attachments (PDF, JPG, PNG, GIF files) with a maximum size of 500 kb
* Limit on the number of multiple choices answers: 13 maximum on live chat (10 on WhatsApp, 13 on Facebook Messenger and Google Business Messages)
A Workflow preview will allow you to :
- Test and learn how your workflow is working in real-time
- Test your workflow at any time during the scenario building
-
Launch your scenario from a selected card, thanks to the button “Current step”
-
Tips: The first time you arrive on the Bot Builder, you need to click on the button “Start”
-
If you are using the “Intent detection question” (1) card
-
It will be possible for you to test our Natural Language Understanding technology and provide test visitor expression and observe the Intent detection
NB: A routing group is automatically created when saving for the first time the workflow.
NB (1): In order for the "Intent Detection Question" card to appear in the scenario, you must first create an intention.
For more information, please see the article:
Intents Manager
2. How it works in detail
To create a new workflow click on Automation > Workflows > Create
- Indicate Name and Displayed name (mandatory)
- Add an avatar ((60px by 60px in PNG, jpg or gif format)
- Choose the language of the workflow
- Define the number of simultaneous conversations
-
Decide how long your workflow should be closed for inactivity :
- chat channel: the default setting is 5 minutes. You can adjust it from 2 to 30 minutes.
- third-party channels: the closing time will be 30 minutes; this criterion cannot be modified.
-
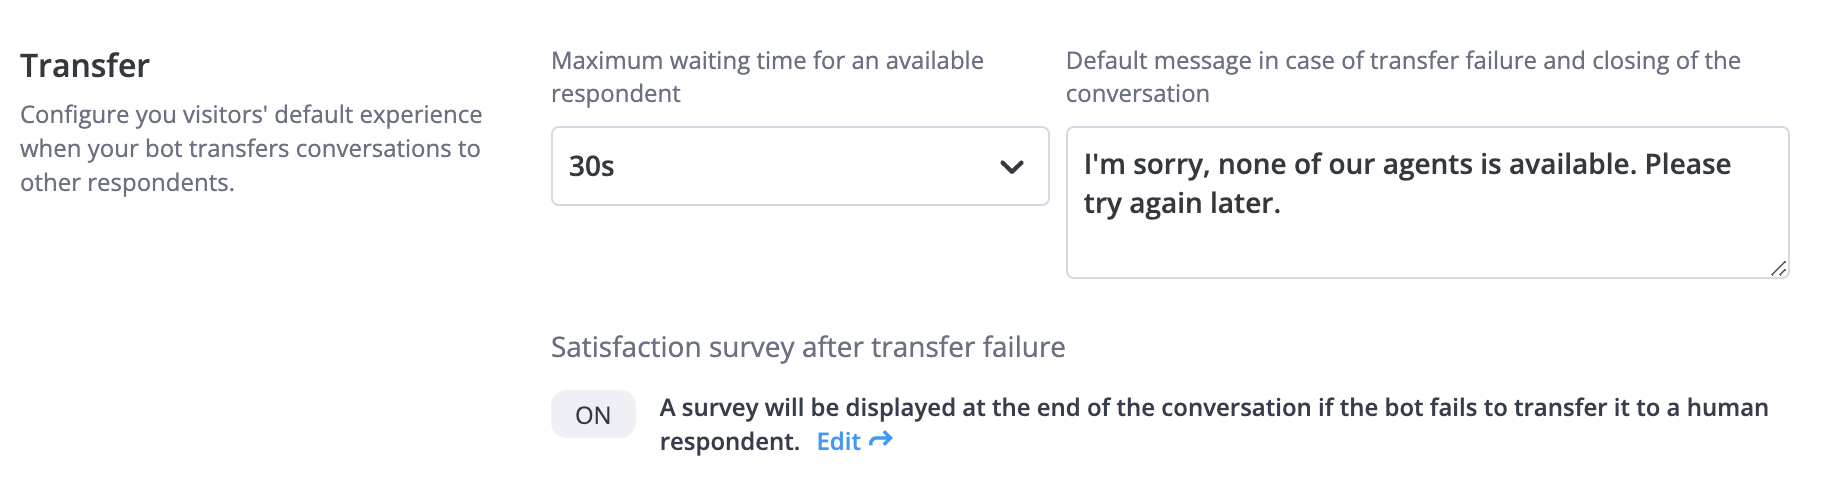
Set up Transfer settings
- Maximum waiting time for an available respondent
- Default message in case of transfer failure
- Activation or not of the satisfaction survey in case of transfer failure
2.2 Manage your Workflows
When your workflow is created, it will be displayed on the list.

- You can edit a workflow by clicking on the name or the pencil button
- Delete a workflow
- Activate or deactivate a workflow by clicking on the button on the left
⚠ When a workflow is deactivated, targeting rules which are using this workflow will not be able to display a notification (not eligible in the targeting strategy)
NB: A workflow that hasn't made any conversations for at least 2 months is automatically deactivated. Once deactivated, it is moved to the top of the list, because it had the most recent modification date.
=> It is possible to reactivate a workflow at any time.