Now that you have set up the video channel, please read the following article to fully understand how to handle video chats in the conversation panel.
1. Receiving a new video call
1.1 Actions to be done on the agent's side
When receiving a new video call in the discussion panel, you will be asked to accept or decline this incoming call.
If it is the first time that you handle video chats, you will also be asked by your browser to authorize iAdvize.com to access your microphone and camera.
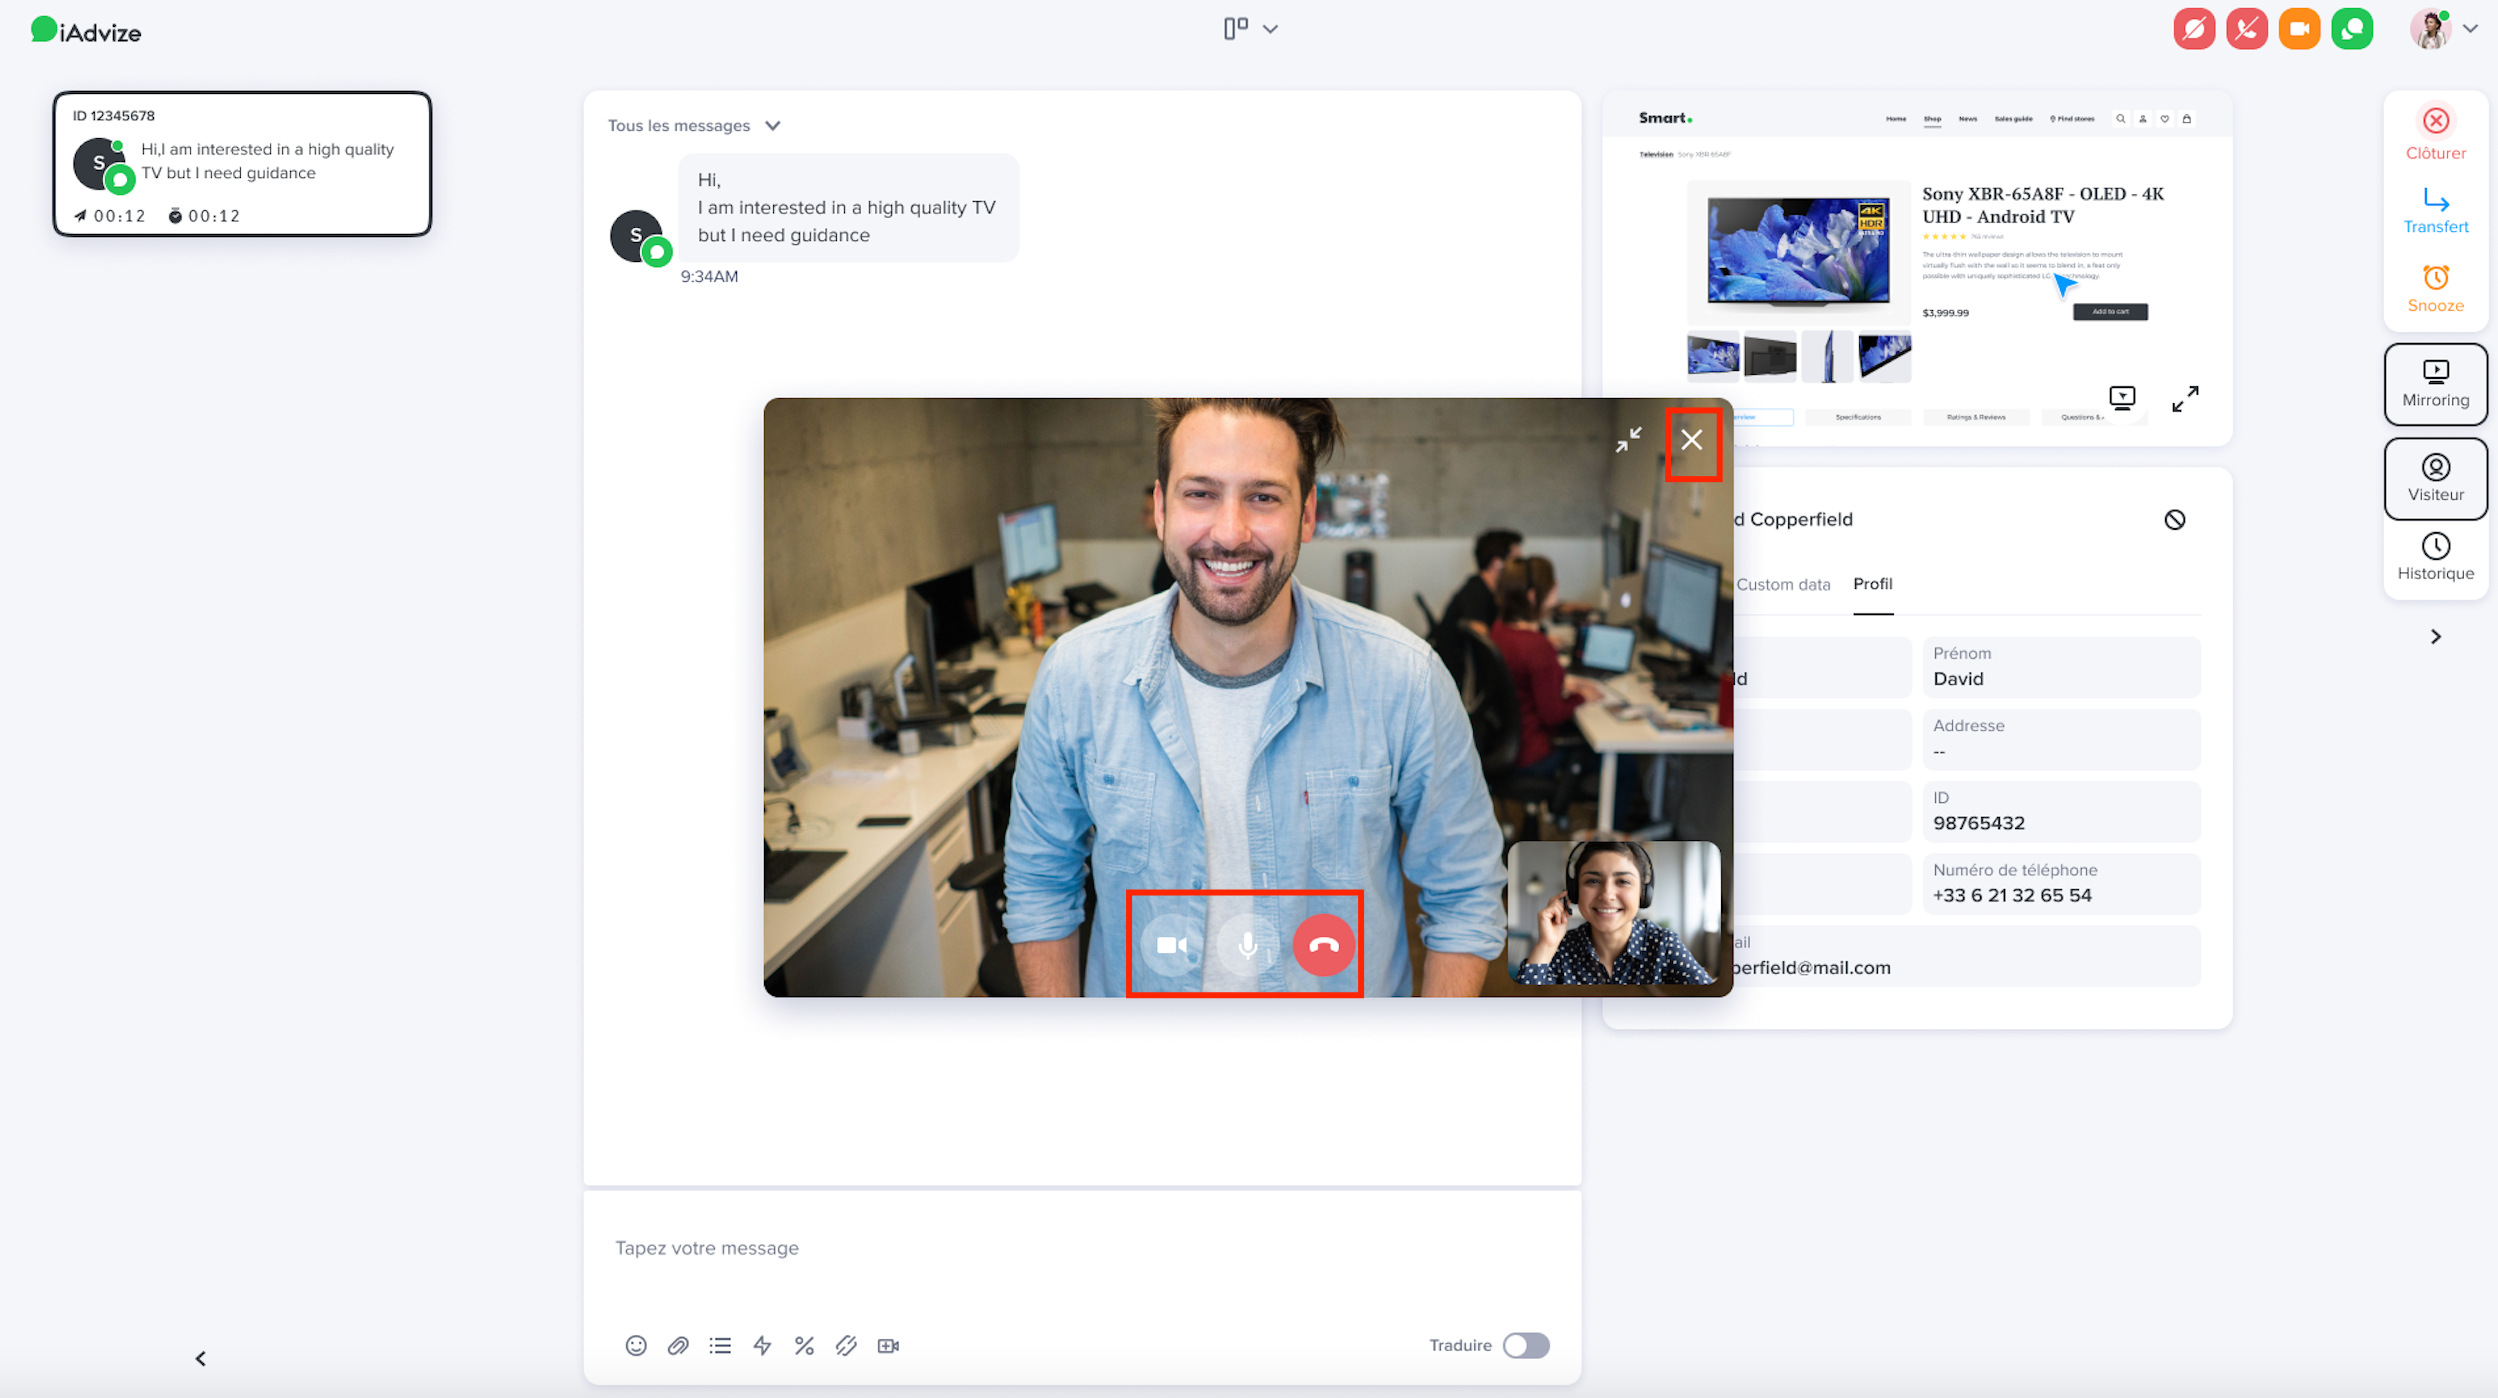
Once you have given iAdvize.com the correct authorizations, a new window will show up in your discussion panel.
If you have not accepted the call yet, you will see a preview of your own video camera. The visitor will also see his/her own video until you accept his/her call.
Once you have accepted his/her call, the video of the visitor will be presented in the middle and your video will be reduced and positioned on the bottom right corner. The opposite will happen on the visitor's side.
1.2 Actions to be done on the visitor's side
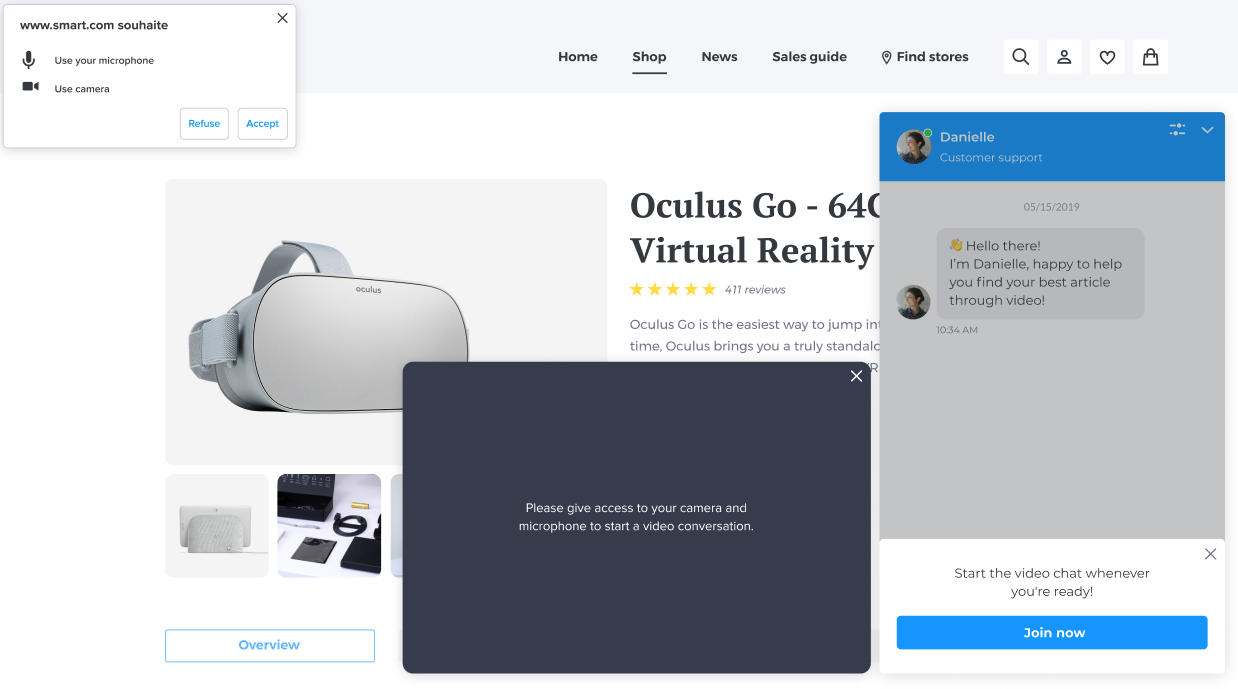
First, the visitor has to authorize the website they are browsing to use their camera and microphone.
After the authorization is done, they can start the video chat by clicking on "Join now" positioned at the bottom of the chatbox.

2. Video chat window
2.1 On the agent's side

Click on the camera icon to switch on or off your webcam.
Click on the microphone icon to switch it on or off.
Click on the red icon or the cross to end the video conversation, but the conversation will not end, which means the visitor can still send messages to the agent, and vice versa. To end the conversation, simply click "End" on the conversation panel to completely close the conversation
You can also send written messages to your visitor.
Example in fullscreen mirroring, the video stream is reduced to the bottom right
To reset it to the original format, click on it.
2.2 On the visitor's side
The visitor can switch on or off his/her webcam, microphone and agent's sound at any time. They can access and read the agent's messages and send the agent messages.
They can also minimize the chat/video chatbox so that they can browsing on the website. After Minimizing, there will be 2 badges shown on the website (see screenshot below)
They can also enlarge the video window.
Once they are done with the video chat, they can simply hang up by clicking on the red hang-up button. But the chat will continue in the chat box.
3. Chat to video escalation
- You has to manage your own availability by switching to unavailable before starting a video conversation. The availability toggles will not be automatically turned off when starting moving from chat to video.
- You will be able to have a video conversation while having ongoing chat conversation.
- You cannot send multiple invitations. If you do not get an answer to an invitation, you can cancel it before sending a new one to another visitor.
- Once the conversation is transferred or snoozed, the video invitation is automatically cancelled.
4. Technical pre-requisites
Network configuration:
- The *.twilio.com domaine must be enabled on your network for the following protocols:
- https://*.twilio.com
- wss://*.twilio.com - iAdvize network pre-requisites must be set up: Adjust your network settings
- Run the following test: https://networktest.twilio.com/. You should not get any error, especially on the "UDP Connectivity" one.
Security:
For security reasons, the visitor's page must be loaded with the HTTPS protocol.

It will not work with the HTTP protocol.
Video quality:
The video stream is compatible with an HD camera.
Compatible browsers:
To use the video channel, your browser must support WebRTC (whichever your operating system).
Here are the compatible browsers:
- Chrome (the last 2 versions)
- Firefox (the last 2 versions)
- Opéra (the last 2 versions)
- Edge Chromium
- Safari, available on iOS only (the last 2 versions)
The following browsers are not and will not be compatible with the video channel :
- Internet Explorer
- Edge (others versions)
- Any browser which does not support WebRTC
Requested rates:
The video quality is adjusted according to the rate:
- Low video quality: UP/DN minimum rate of 128 kb/s / 128 kb/s, recommended UP/DN rate of 300 kb/s / 300 kb/s
- High quality video: UP/DN minimum rate of 400 kb/s /400 kb/s, recommended UP/DN rate of 500 kb/s / 500 kb/s
To know more about how to set it up, please read this article: Set up the video channel