If you need to manage numerous responses, links or offers from your iAdvize administration, we recommend categorising them so that you can access them more quickly in the future.
This article shows you how to implement categories and sub-categories.
1. Accessing category management
To access to the categorisation of responses, links or offers, go to Settings > Advanced settings > Canned responses.
To view the list of categories, click on "Canned responses".
2. Creating a category
To create a category, first select the wished category. In this example, we have selected the category "Canned responses". Then click on ![]()
Next, click on "Create canned response category".

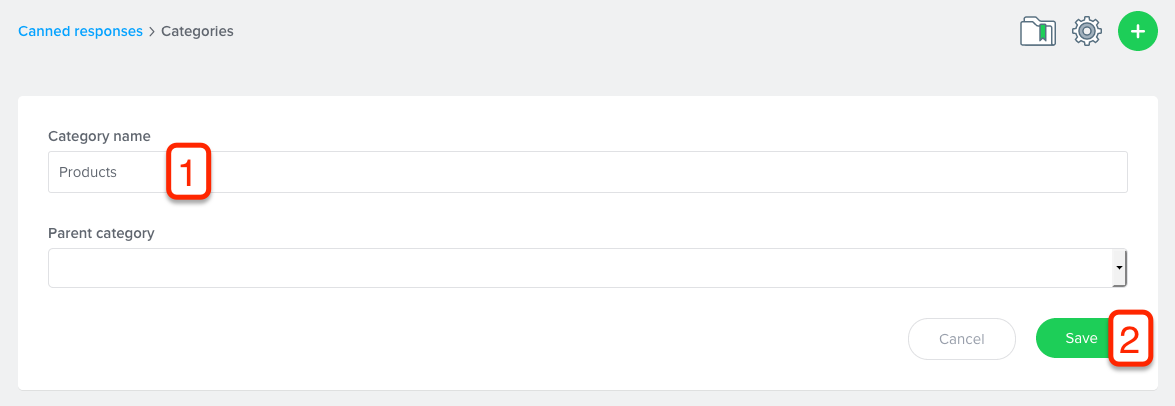
Name the category (1) then save (2).

In this example, we have created the category "Products".
3. Creating a parent category
A category becomes a parent category when a sub-category is attributed to it. If you wish to use different levels of categorisation, you should first create your top-level categories, then the second-level categories that will be assigned to them.
Let's return to our example. We have just created the category "Products". For this to become a parent category, we will create two sub-categories, "Products A" and "Products B" which will be assigned to it.

The category "Products" becomes the parent category for "Products A". Then, click on "Save".
4. Managing categories
It is possible to manage categories in two ways
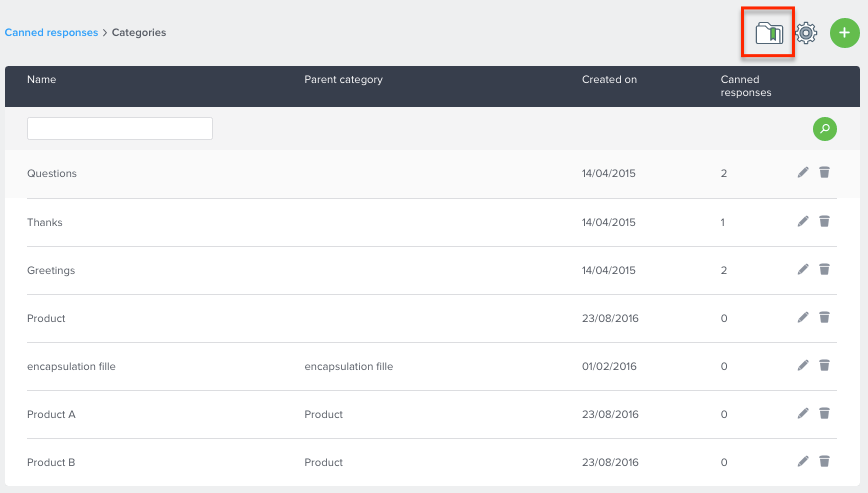
First, by clicking on this icon ![]() :
:
- Carry out a search to quickly find a category and find out how many elements (responses, links or offers) it contains.
- See which parent category each category is assigned to.
- Modify a category using the icon
or delete it with

Second, by selecting the drop-down list :
- View the messages attached to each Category
- Edit the category's message by clicking on this icon
or delete it with
For further information go to: